

【Hexo基础篇】05.网站的构建与上云(Github Pages)
本篇我们将教学如何将你的网站仓库推送至Github,
并通过Github Action自动构建并部署你的网站至Github Pages
创建Github账号与仓库
注册账号
进入官网 https://github.com/

点击右上角的注册(Sign Up)按钮进行注册

注册后前往你自己的邮箱,点击链接进行验证
配置Git
打开你的cmd,按照顺序输入下面的指令
git config --global user.name "你的用户名"
git config --global user.email "你的邮箱"
验证是否配置成功
输入git config -l

2个项目均有值即配置成功
使用VS Code连接至Github
切换到源代码管理选项卡

链接你的Github账号
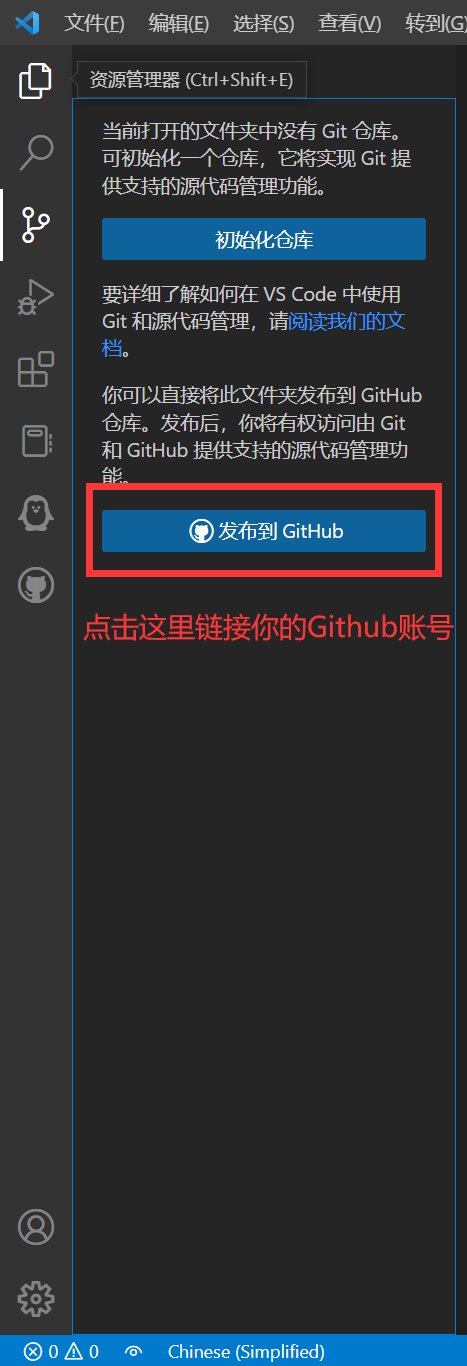
在打开的窗口中登入你刚才注册的账号即可
开始上传仓库

在弹出的提示框中,选择第二项,并且修改仓库名称为<你的用户名>.github.io
当出现以下提示时,代表你已经成功提交了仓库!

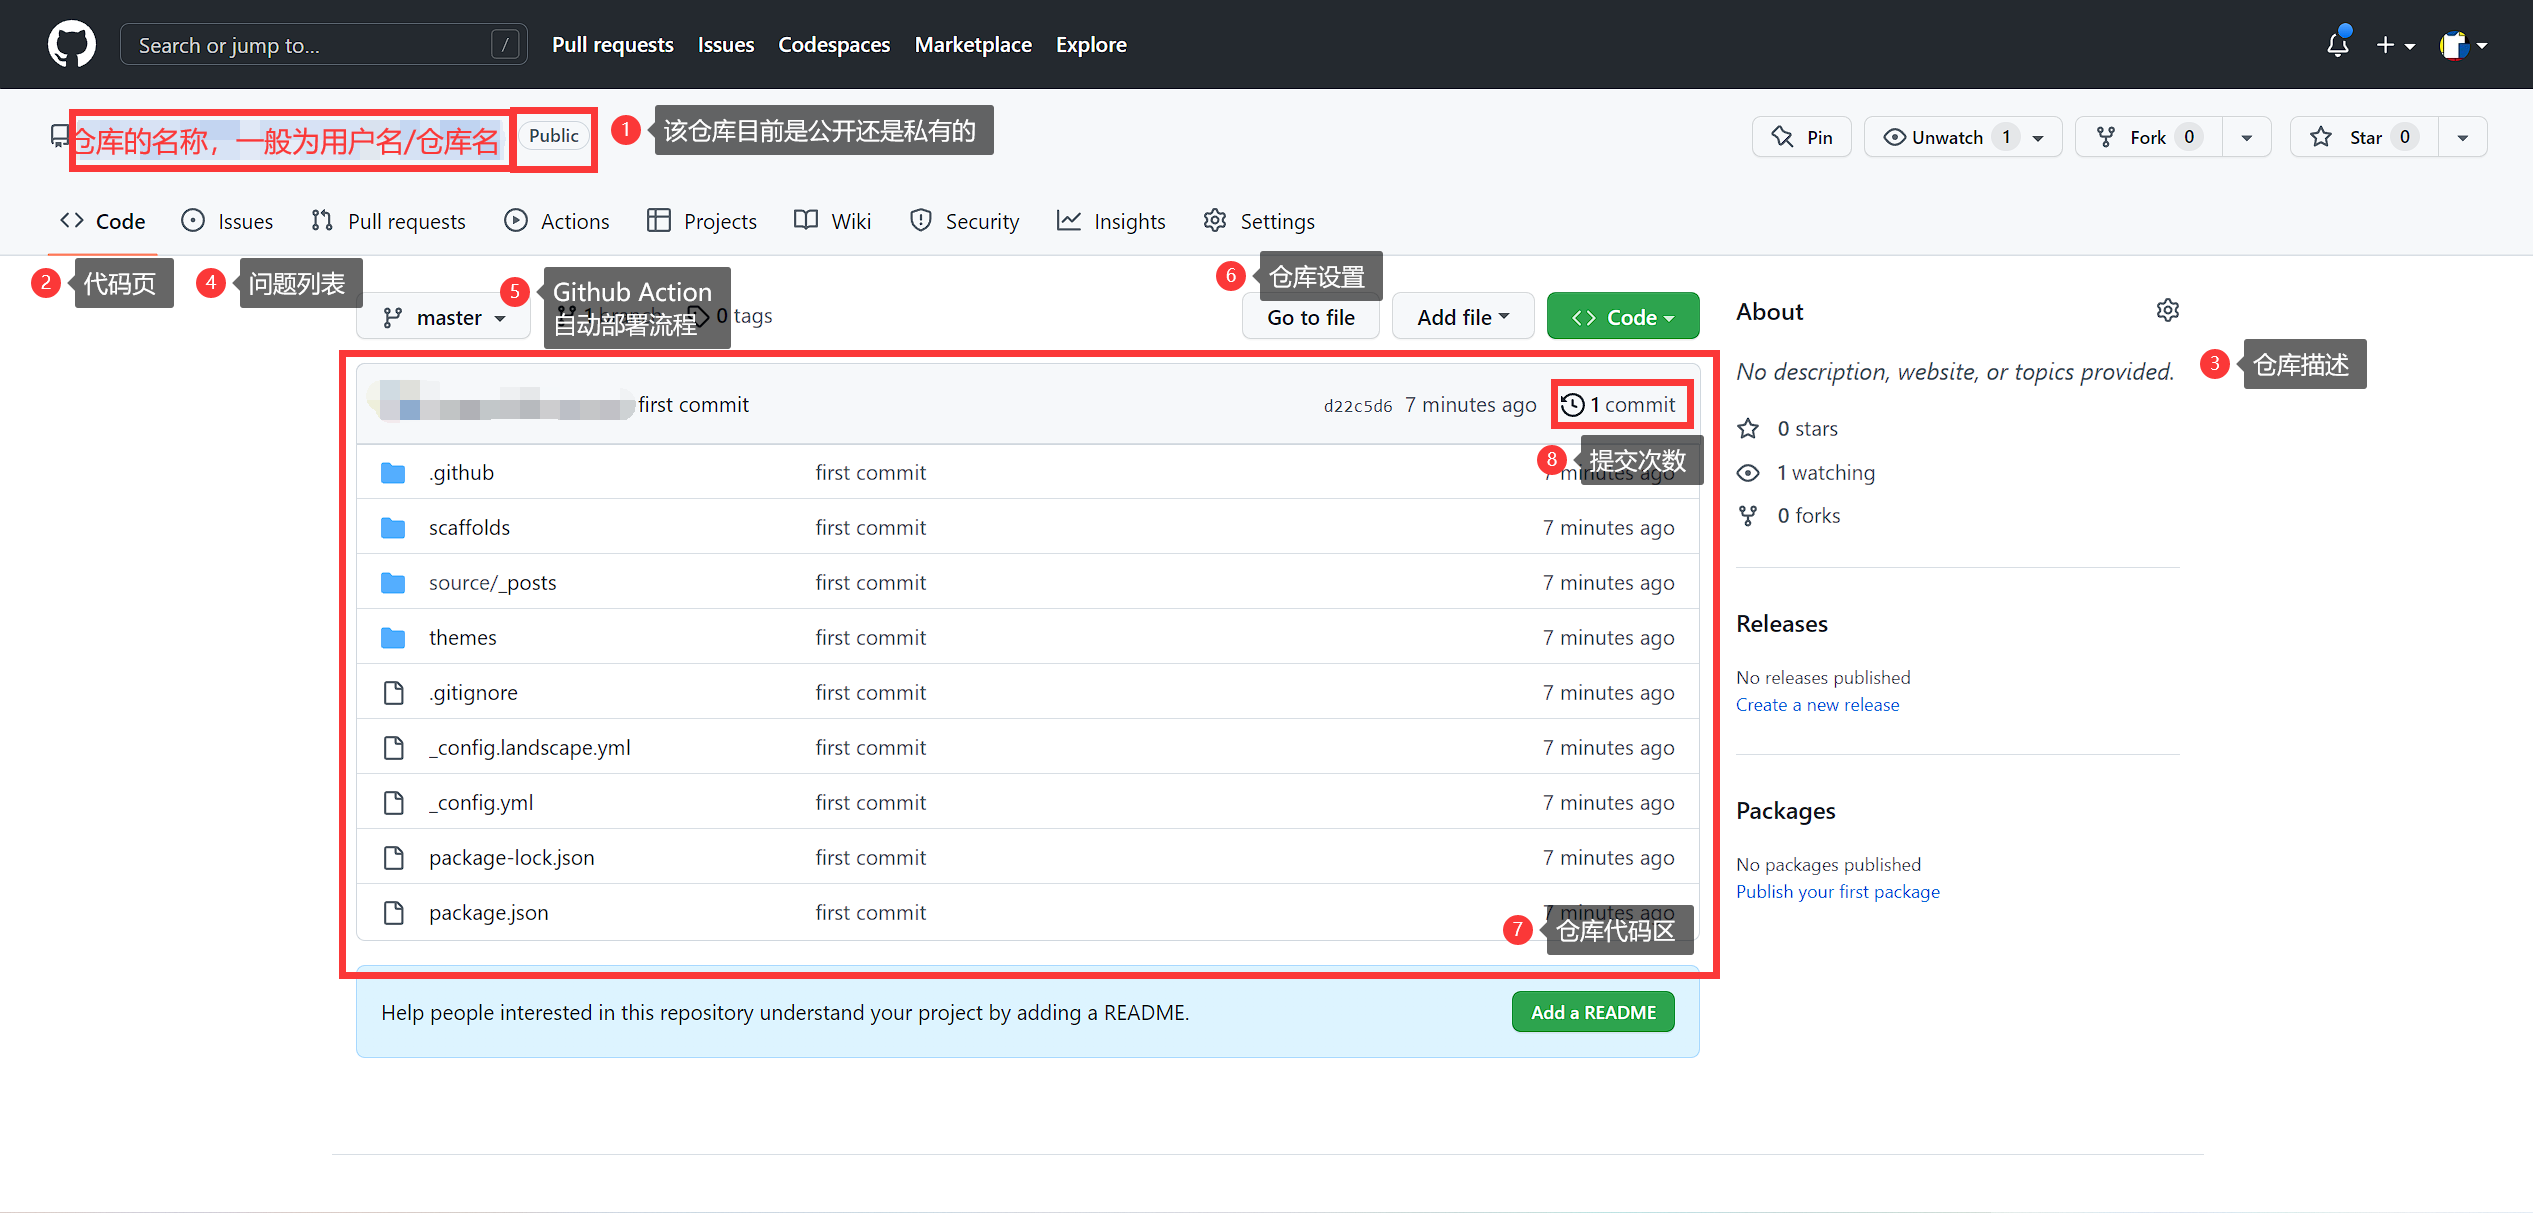
了解Github仓库页面
创建Github Action自动部署
使用
node --version指令检查你电脑上的 Node.js 版本,并记下该版本 (例如:v16.y.z)在储存库中建立
.github/workflows/pages.yml,并填入以下内容 (将16替换为上个步骤中记下的版本):
.github/workflows/pages.ymlname: Pages
on:
push:
branches:
- main # default branch
jobs:
pages:
runs-on: ubuntu-latest
steps:
- uses: actions/checkout@v2
- name: Use Node.js 16.x
uses: actions/setup-node@v2
with:
node-version: "16"
- name: Cache NPM dependencies
uses: actions/cache@v2
with:
path: node_modules
key: ${{ runner.OS }}-npm-cache
restore-keys: |
${{ runner.OS }}-npm-cache
- name: Install Dependencies
run: npm install
- name: Build
run: npm run build
- name: Deploy
uses: peaceiris/actions-gh-pages@v3
with:
github_token: ${{ secrets.GITHUB_TOKEN }}
publish_dir: ./public当部署作业完成后,产生的页面会放在储存库中的
gh-pages分支在储存库中前往 Settings > Pages > Source,并将 branch 改为
gh-pages前往 username.github.io 查看网站
如果你不希望将你网站的配置文件上传到Github,你可以继续阅读Hexo 进阶教程来学习
VS Code后续文章书写与提交
你可以仍在VS Code中进行写作,通过VS Code的Github扩展提交更新

提交更新后再次点击推送按钮,将更新推送至Github
- 感谢你赐予我前进的力量
-
 微信
微信 -
支付宝
赞赏者名单
因为你们的支持让我意识到写文章的价值🙏
阅读建议


评论
隐私政策
你无需删除空行,直接评论以获取最佳展示效果